So, what we waiting for, let’s do it.
1. Find some images from internet for the background. In this corel draw tutorial, I use images about flower sketch from here. Put the file in to corel draw area. File – Import – select the file.
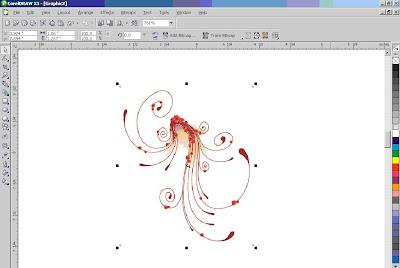
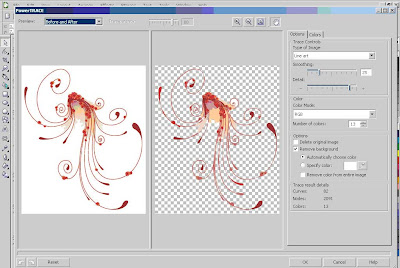
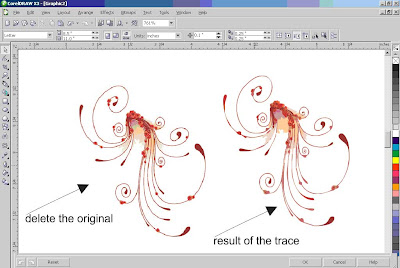
2. Click the image, and in top bar menu select Bitmaps – Trace Bitmaps – Line Art. Wait the process, and click ok. Voilaaa, the images has been convert to vector. Remember, to delete the original image behind the result of the converted image.
3. Now, change the color by select the vector image, and left click the color in the right side corel draw area.
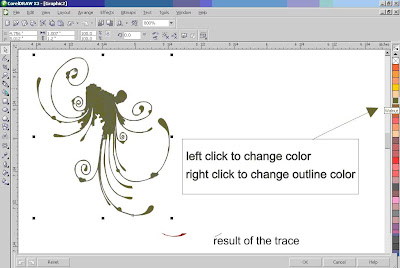
Give the outline color by select the vector image, and right click the color in the right side corel draw area.
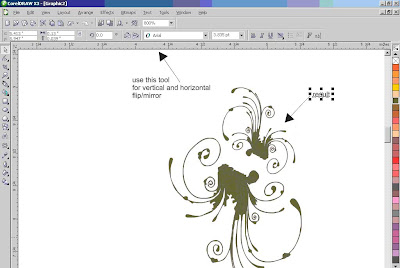
4. After that, copy the vector image, so it becomes 2. Scale down one of the image and flip horizontal and vertical, so the result like this.
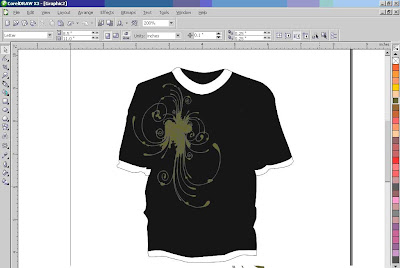
Join it, and open shirt template you can download in here. Copy the shirt template and paste in your work area. So the result will be like this.
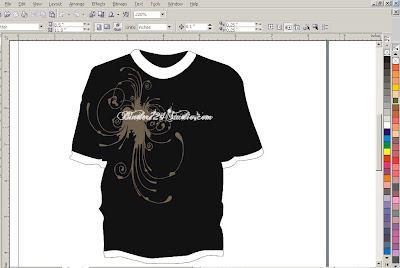
You can add some words in front of the background. In this case, use words my studio name, binder724studio.com. I use font Ginga. You can download it from here, if you don’t have it. Example like this:
That’s all. With powerful tool from Corel Draw X3, you can make improvisation and creativity with the tutorial. A lot of customization you can make, with more perfect design and color composition.
1. Find some images from internet for the background. In this corel draw tutorial, I use images about flower sketch from here. Put the file in to corel draw area. File – Import – select the file.

2. Click the image, and in top bar menu select Bitmaps – Trace Bitmaps – Line Art. Wait the process, and click ok. Voilaaa, the images has been convert to vector. Remember, to delete the original image behind the result of the converted image.


3. Now, change the color by select the vector image, and left click the color in the right side corel draw area.

Give the outline color by select the vector image, and right click the color in the right side corel draw area.
4. After that, copy the vector image, so it becomes 2. Scale down one of the image and flip horizontal and vertical, so the result like this.

Join it, and open shirt template you can download in here. Copy the shirt template and paste in your work area. So the result will be like this.

You can add some words in front of the background. In this case, use words my studio name, binder724studio.com. I use font Ginga. You can download it from here, if you don’t have it. Example like this:

That’s all. With powerful tool from Corel Draw X3, you can make improvisation and creativity with the tutorial. A lot of customization you can make, with more perfect design and color composition.
1 comment:
nice..thanks..but when I copy shirt template to flower print... images overlap..flowers hide behind shirt..how to solve this ?
Post a Comment